

I made sixty reindeer for the grand kids to take to school.

I modified the pattern that I had made last year for the elf candy canes..

If your wanting to make some yourself, I've included in this post a printable pattern along with some pointers on how I constructed the reindeer candy canes.
I like to cut all the pieces that I'll need- all at once and have everything in piles and then glue all the paper pieces together. I then construct the candy cane bodies, and after those two piles are constructed, it is just a matter of attaching the paper to the candy cane and it is finished.

For the heads/faces of each reindeer-- your needing one head piece cut on the fold of some brown card stock. I used white glue to attach the pinks of each ear along with the beige fur piece between the ears. I used hot glue to attach the 5mm red pom pom and the wiggly eyes. I also glued about 2/3 of the front and back of the reindeer's head together, I'd say from the nose up- use glue, nose down-- no glue. Don't glue it completely together as you'll be needing to slip a piece of a Popsicle stick in between the paper to act as the reindeer's neck.
 Once the features on the reindeer's face are finished, I attach a brown pipe cleaner bent to look like an antler to the backside of the head, beside each ear.
Once the antlers are in place, I used white glue to attach one of the two red Santa hats needed for each reindeer to the front of the head.
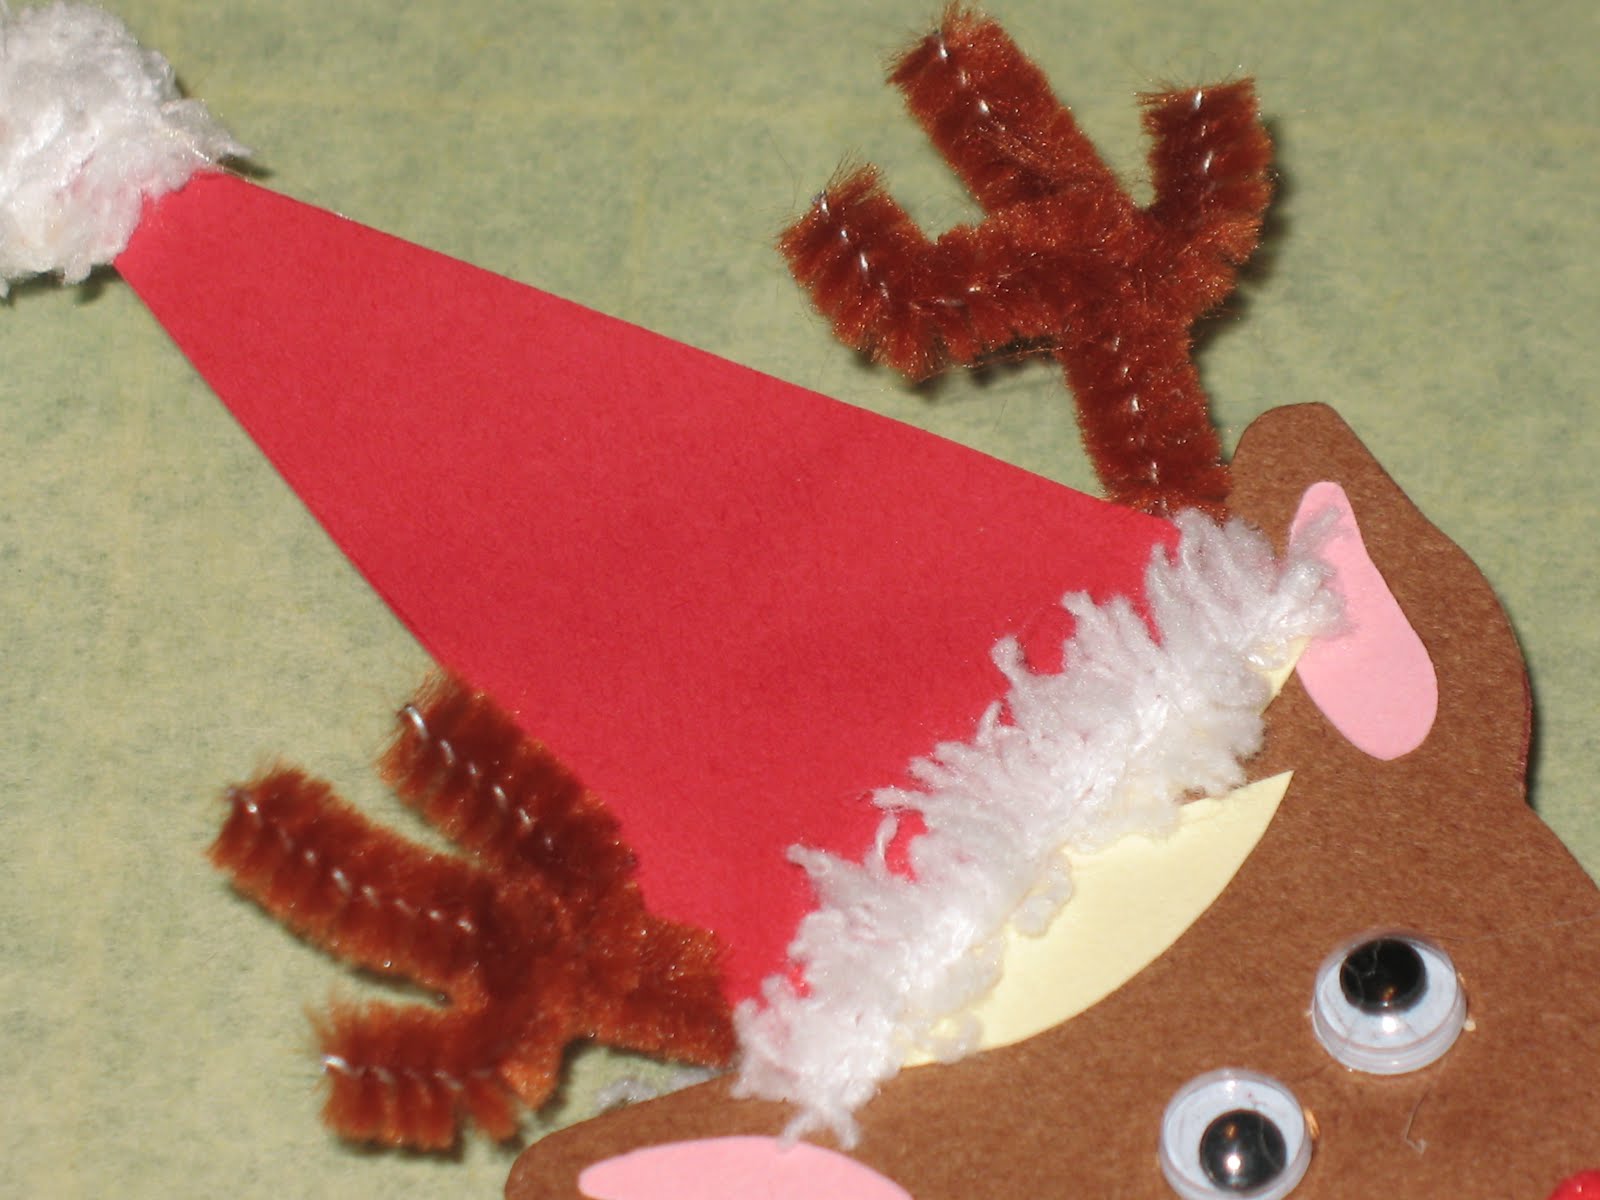
The second red hat will be glued on the backside to cover the edges of the pipe cleaners so it looks nice. You will need to use hot glue to get a good seal over the pipe cleaners. I used a white yarn called "Fluffy Chunky" to create the look of white fur on the hats brim and pom pom. I again used hot glue to attach that. Lastly, to finish up each head, I cut a popsicle stick into thirds and covered the stick using the same brown colored paper as the head and body. I then hot glued each neck into place between the unglued portions of the head.

For each reindeer's body I traced the bodies onto a folded piece of brown paper and cut them out. The beige tummy-fur was glued on with white glue. Lastly, I cut a small sliver out of the papers fold in the center to create an opening to slide the neck/popsicle stick into. Below is a photo of the cut created. Shown with the paper opened to showcase it better.

With the cuts in the bodies fold, it was easy to slip the neck into place and hot glue in place to one side of the body.
 To create the candy cane body... I cut out four reindeer hooves out of brown felt. I then glued a hoof to the bottom of each candy cane and then another one to the other end. One will be the foot and the other the hand. Once all the hooves were attached, I hot glued two candy canes together.
Once the glued dried I wrapped some masking tape over the glued area for added strength.

Once the bodies were completed, it was just a matter of taking the paper reindeer that I had previously put together and gluing it to the candy cane arms and legs. I put a dab of hot glue on the tape in the front--- and glued the paper torso in place. I put some glue on the backside on the tape along with some glue on each side of the body to hold it together.

Then I pulled the paper taut as I held the pieces in the glue until it set.

Easy peasy... Lastly, I added a white bow to the reindeer to finish it off. He is a handsome fella' isn't he?
Once you get the hang of creating the reindeer, it is very easy to mass produce them once all the pieces are cut out.

I've already got two ideas for next year... a ballerina and a toy solider.
big hugs,

So cute ! The children will love them. Hope you have kept a journal with pictures of all the treats you have made for your Grands' classmates over the years. Bet they would love seeing it many years from now.
ReplyDeleteEnjoy your evening.
They are ADORABLE! I love the little tilted head!
ReplyDeleteMerry Christmas!
Lovely idea, sweet result !!!!
ReplyDeleteHave a nice weekend !
Anna
Oh but they are soon cute! I'm going to make these with my 11 y.o. daughter!
ReplyDeleteso glad you left me a comment so I came over to find your blog! So inspirational, thank you!
Now following and you're welcome to follow to and keep in touch!
Happy weekend!
These are adorable and your instructions are terrific! I might have time to make these -- if I do I'll let you know!
ReplyDeleteOh Cheryl those are just too cute, so very clever and creative of you, I bet your grandkids feel very special to give these away to their classmates, you are a wonderful grandmother!!
ReplyDelete